
H
S
May 2020 Lock-Down Email
WE WILL BE BACK IN BUSINESS AS SOON AS IT IS SAFE TO DO SO
We hope
you are all continuing to keep well and are managing to
keep yourselves occupied. Thank you to those who responded to
the last
e-mail from the committee, it is good to keep in touch during
these difficult
times. Two members have been particularly busy and have
written about
their projects.
If
you have trouble reading
this email or have difficulty seeing the pictures it can be found at:
http://www.edgworth-horticultural-society.co.uk/newsletters/monthly_news
You
can skip to an article by clicking on it
- Making
Wildlife Pond
– Iony Murphy
- My
Mud patch
– Jean Turner
- 4-Day
Holiday is rescheduled
- Special
House Guest – Part 2
Panic about a
dustbin! – Phil
Broughton
- Snippets of EHS History – David Spencer
- Gardens
I have loved and visited – Chateau at
Chenonceau, France –
Angela Swallow
- Did
You Know?
– Irene Spencer
Making
a
Wildlife
Pond
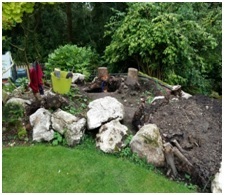
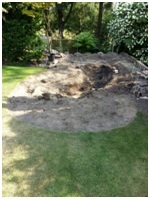
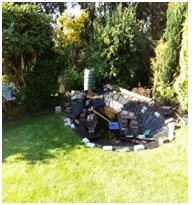
FROM
THIS
TO THIS
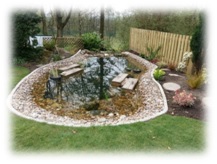
IN
NO EASY STAGES !!
Tony and Carol Murphy
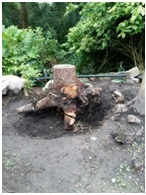
have been busy taking down 2 diseased trees and finding the
ground they
were left with was full of tangled roots and rocks, some quite large. Tony
found the perfect way to deal
with this by
inviting the family for tea, it worked a treat. After some
consideration
it was decided to create a wildlife pond and he has
written an article explaining how this was done. If you are
feeling fit
and strong you might want to create your own pond.
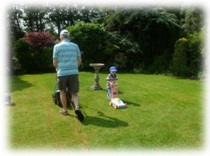
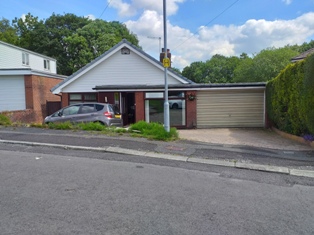
The
story starts back in 2018. We noticed a couple of diseased trees in the
corner
of the garden and after some thought we decided to have them taken
down. This
left us with some very fine tree stumps and rocks. The area is one end
of a
very mature rock garden border. In the LHS photo it is the area between
the
mahonia (behind the bird bath) and the dome topped conifer.
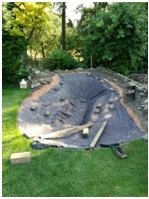
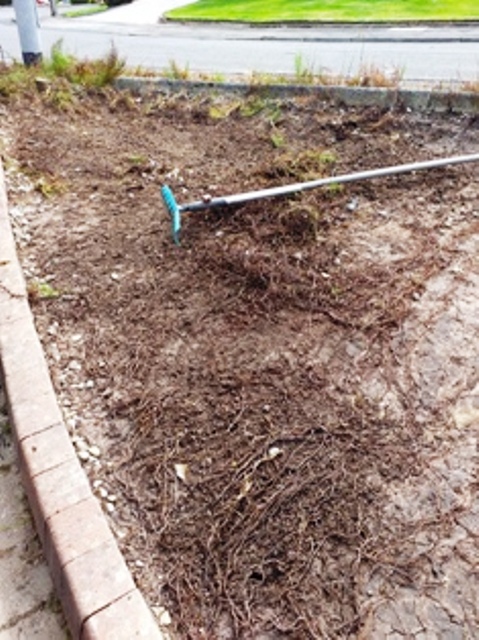
With
no clear
aim
in site I began to clear the area. It very soon became apparent that
this was
not going to be easy as the ground was packed solid with roots, ranging
from
threads up to 4 inches thick. The rocks were turning out to
be a bit
'iceberg' like. A dinner plate sized one turned out to be about 4 foot
long and
at least 2 foot thick and not rock but poured concrete. This was a case
of
finding the right tool for the job.

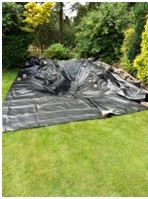
Now, I
think,
is a
good time to have a quick word about the lie of the land. We live on
the side
of a hill. There are 36 steps from road side to the bottom of the
garden. The
back garden is divided into 3 levels. The pond site is at the back of
the top
level. It is in a corner, to the right, and behind the picket fence is
a 3-4
foot drop into our neighbours garden and to the rear is a 4-5 foot drop
to our
second level. You can just see the roof of the greenhouse behind the
pond. The
back of the site drops away so I used some of the larger rocks to build
up the
back to create a more level area.

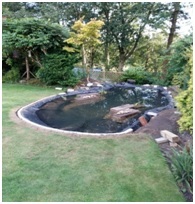
This
is definitely one of those jobs that you would do so much better second
time
around. We are a bit short of ledges for marginal planting.
This has been
overcome, to some degree, by buying three floating planters which have
been
very successful, and at this early stage of the pond's development,
they give
interest and movement.
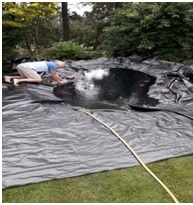
I
had decided that a bog garden would be a good idea so at the far end
there is a
couple of foot that is only about 3-4 inches deep. This great idea had
not
taken into consideration that soil and water don't mix or, to
put it
another way, they do mix, and when they do they make a
cloudy, muddy
mess. To overcome this I got an off cut of liner and lay it across the
bog area
and up above water level at front and sides. The back creates a natural
overflow for the pond. All the raised edges were supported by stone. I
now
needed to buy quite a few bags of aquatic compost, which is both heavy
and
expensive, and lower it into the water without making too much of a
mess. It
has now settled down and doesn't seem to be a problem.
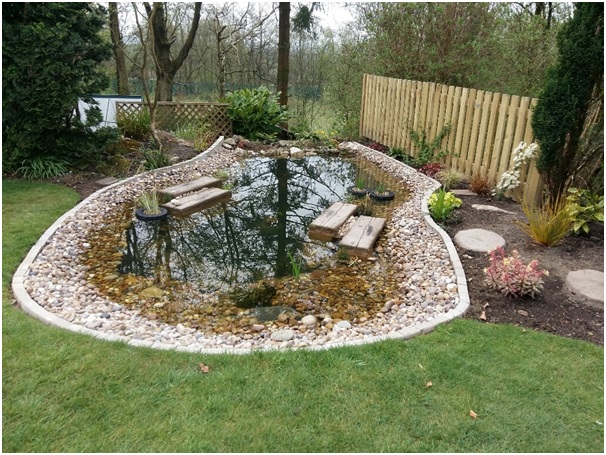
I
have made the sides of the pond a bit too steep and the pebbles have a
habit of
surrendering to gravity and making their way into the deep. Did I
mention that
at its deepest its 3 foot, so retrieving the little blighters is a
challenge.
This problem of pebble roll is exacerbated by the birds. To
our delight
they are using it like a public lido. They run up and down the pebbles,
paddle
and bathe. I suspect they will be skimming them across the pond before
long.
Tony
Murphy
..................... Back to top.........................
Jean Turner recently moved house and had
a
‘blank’ canvas to start a new
garden. This is how she began her project which I imagine
will take some
time to
finalise.
 |
 |
|
 |
||
|
Few
of us have the opportunity to create a
new garden from’ scratch’ but this
happened to me when I moved house last June. |
||
 |
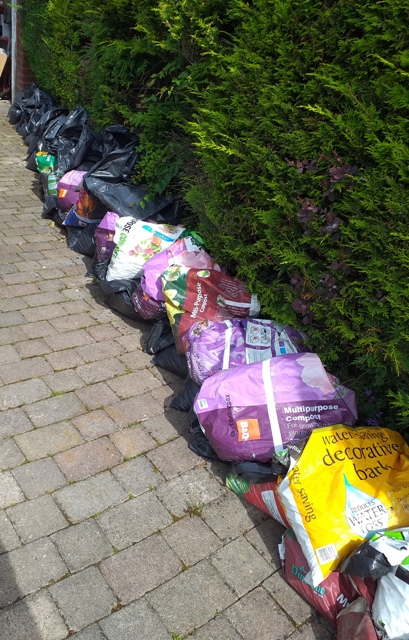
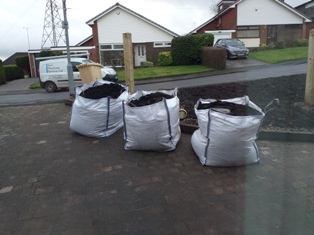
I
applied a ‘specific Mare’s
Tail’ weed killer in July and then September and waited for
the foliage to
blacken. In December I started to dig over the heavy clay
soil and take out the hidden bricks. I had help to position three
sturdy posts and I distributed ten bags of horse manure.
Later I spread a tonne of composted bark. Christmas 2019 passed in desperation. In the week between Christmas and New Year I threw all my pre-ordered bulbs into pots, no time to put them in the ground! In mid-February I transferred them into the ground ‘better late than never’ |
 |
 |
||
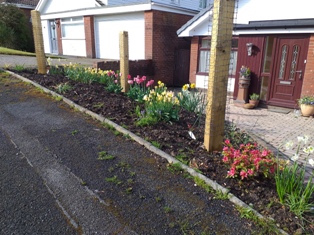
| The result?? I have colour on my ‘Mud Patch’,two climbing roses on my posts and an order of clematis arriving soon. So much to look forward to. | ||
Jean
Turner
..................... Back
to top........................
4-Day
Holiday
is rescheduled
Our
4-day Holiday to the Scottish Borders in June this year has of
course been called off and we have organised it instead in June 2021.
Travel
Editions have been most helpful throughout this tricky time and have
negotiated
with the existing hotel to transfer our booking to Thursday
June 3rd to
Sunday June 6th 2021 at the same
price. The itinerary remains the same
though the order of visits may need to change to suit the gardens. This
can be
found on the web site by following the Programme/holidays
menu. There are
spare places – contact Phil or Jean if you are interested: holiday@edgworth-horticultural-society.co.uk
..................... Back
to top........................
Special House Guest – Part 2 Panic about a dustbin!
|
On April 28th my little guest – a Blue Tit - was well settled into the nest box and was continuing to improve her cup-shaped nest at the bottom. For several more days, all day until late, she flitted back and forth fetching moss, grass and straw, then weaving it into her nest. A few loosened feathers began to appear around the nest indicating she was getting ready to lay her eggs. There was no sign of her boy friend though! |
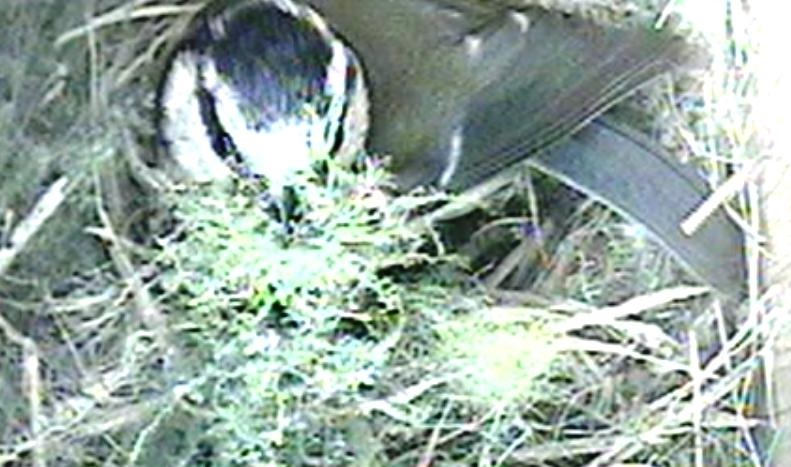 |
| Curiously, during this time she spent several periods of about 10 minutes loudly pecking around the inside of the entrance hole. I can find two uncertain explanations. Either she wants her family’s home to be just as she likes it and is slightly reshaping the hole to suit, or is it way of assessing the quality of the wood and if it will be good enough to raise a family?. Has anyone some better ideas? | |
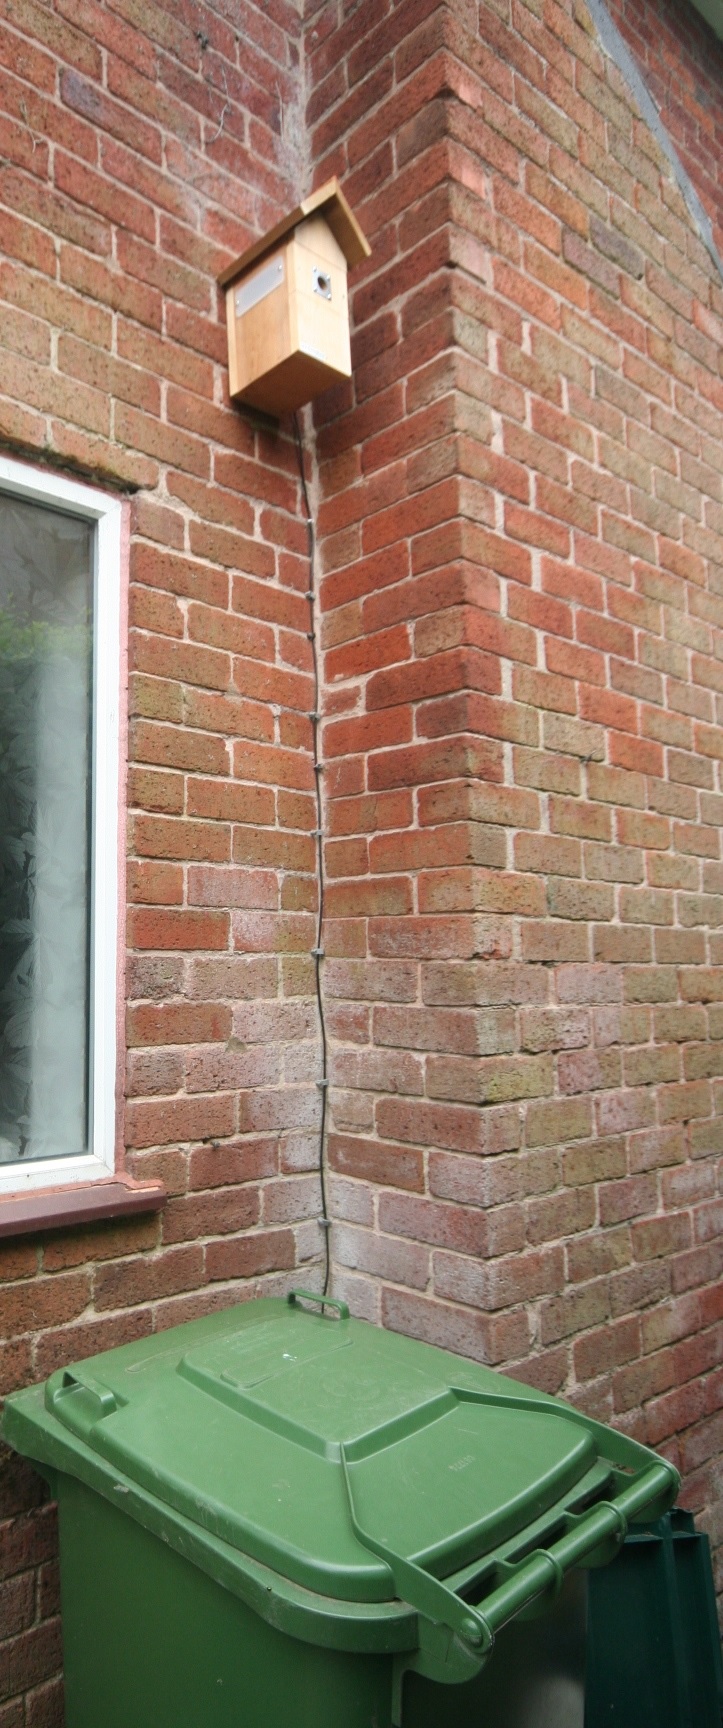 |
The
camera in the roof of the nest box also has a microphone
through which I usually hear only rustling. That is except for one
night when a
regular loud ticking noise came from the speakers. It was already dark
and
there was no sign of her fluffed up body sleeping in the box. I
investigated
outside. It was pouring with rain and the leaky joint in my roof gutter
was,
every second, dripping loudly onto the wheelie bin beneath. Had this
scared her
off? I moved the bin and hoped. Like a worried father I kept checking until going to bed – she didn’t return. Why would she abandon a warm dry nest on such a wet night? Was my neglected maintenance the reason? I checked first thing next morning; she wasn’t there. Then mid morning she was back, not a feather out of place and again arranging the nest. Perhaps she’d had a wild night out with her partner! |
|
On
April 4th,
I watched as she energetically jiggled
around on
the nest with her tail
wagging vigorously, then rotated 90 degrees and jiggled again,
repeating this
for a couple minutes whilst occasionally looking down into
the nest as if
to check if anything had happened. At the end of this she jumped out of
the box
– revealing two eggs. |
|
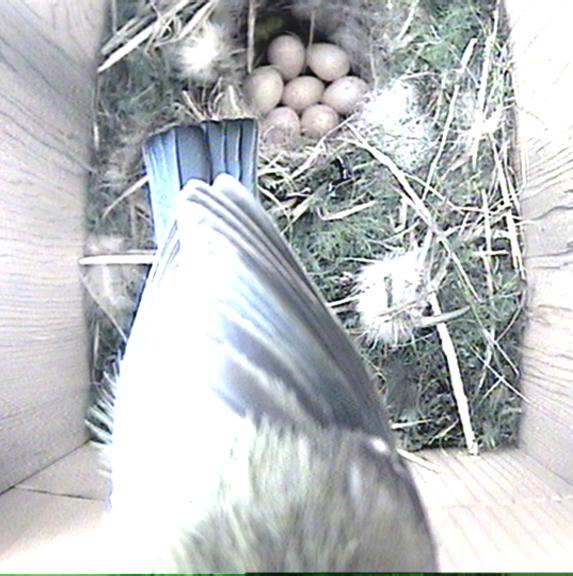 |
The
female Blue Tit plucks
feathers from her abdomen to create a bare patch with a good supply of
blood
vessels (called a ‘brood patch’) which helps her to
keep the eggs warm as she
incubates them. She starts incubating the clutch a day before
it’s complete and
will sit on the eggs for 13 to 15 days (sometimes longer if
it’s cold) until
they are ready to hatch. Her
mate has now appeared, occasionally bringing grubs and other
food which he gives to her. This is accompanied by much chirping
before he enters and whilst
with her. Each visit lasts just a few seconds. On a few occasions she
had “gone
out” and he seemed quite distracted,
looking at the eggs, then all round the nest, hopping up to the
entrance hole
and standing there chattering loudly and then back inside to check
again -
presumably in case he’d overlooked her last
time! |
| By my calculation the first of the eggs should hatch about the time of Irene’s “go to press” date so you’ll have to wait until the next email to find out how things progress! | |
Phil
Broughton
.................... Back to top.......................
The Society was established in November 1973 as 'The Edgworth and District Horticultural Society' following a Public Meeting called by the Village Institute Committee. This committee had operated for many years 'to promote the social and cultural activities in the village and to ensure the continued use of the Barlow Memorial Institute'; much as The Barlow Committee still does today. As with many voluntary societies it had its ups and downs and had to fight off demolition of the building in 1965 (some things never change). In 1972 there were 26 organisations active in the village but no Horticultural society, although they did run an annual Flower Show. The 1970 schedule listed 30 classes, mainly flowers (as title suggests) but also cakes and jams.
As the Barlow Institute, as it was still known, was Council owned and the impact of the impending re-organisation of Local Government in 1974 was uncertain, this led to the decision to set up an independent Horticultural Society (as mentioned above). The Flower Show's format was transferred to our new Committee, as were the 8 Trophies which had been donated by prominent people in village life. The current number of Trophies is 25.
So the Society was now 'up and running' with its annual subscription set at 25p (soon raised to 40p) - now still only £3 - great value I think you will agree. The committee's initial efforts went into organising the Annual Show, arranging discounts for garden supplies and looking into the provision of allotments. There were 72 members by April 1974 but it took another 12 months before all the teething problems were resolved. The Show went ahead in August with help from the Grey Mare Rose Society from Harwood who had close links with the Village Institute Committee.
In my next 'Snippets' I shall tell you about the 'back story' (the current 'buzz word') of the Society.
David
Spencer
......................
Back to top.......................
Gardens
I
have loved and visited – Chateau at Chenonceau, France
As Phil and Kirstie (TV presenters) would say it’s all about location – and this Chateau and it’s gardens makes the most of it’s location in spades! The striking 16th century Chateau at Chenonceau is situated on the beautiful River Cher in the French Loire Valley.
We visited on a beautiful warm sunny August bank holiday some eight years ago. This was our first visit. We were immediately impressed with the stylishly restored and decorated interior, wondering if they dressed up especially as if they were expecting special guests! Not so apparently Chenonceau upholds a time-old tradition of making lavish floral arrangements for every room. Each arrangement individually styled, the colours and textures echoing the furnishings and paintings. No dusty dull interior here - the rooms have been so well-restored that at times they give the impression that time has simply stopped.
 |
When you enter the house from the main entrance you appreciate how the original architects maximised the Chateau’s location straddling the river. This is particularly evident when viewing the river and the gardens from the high gallery. The view below is spectacular as the main part of the house is built on a series on arches that span the river Cher. I have a strong memory of walking down the long-windowed gallery that runs the length of the house and looks down on the glistening River Cher and the rose garden below, which was in full mid-summer flower! |
The
gardens are divided into depicting its history and
ownership – the rose gardens (Medicis), fountain / shrub /
raised
terraced area
(Poitiers), the green garden (Villeneuve, English style natural
woodland) and a
maze.
I also recall a well-tended
large
kitchen garden.
Chenonceau
Chateau is known in France as the “Ladies’
Château” because over the centuries it has won the
hearts
of a number of women,
who became quite devoted to it. The mover and shakers, names peppered
through
time have owned and influenced – Catherine de Medicis, Diane
de
Poitiers and in
more recent times the Menier family.
In
1913 the château was acquired by Henri
Menier, a member
of
the Menier
family, famous
for their
chocolates. During
World
War I, Gaston
Menier set up
the gallery to be used as
a
hospital ward during the Second
World War.
The
château was bombed by the Germans in
June
1940.
The
house
and gardens were first opened to the public in 1913 and the chateau is
still
owned by the family to this day.
Angela
Swallow
.. ....................
Back to top.........................
.............................................
DID YOU KNOW?........
- 2020 – Ironically it is the ‘International Year of Plant Health’. (I wonder if we will have an ‘International Year of Human Health’ any time soon).
- Can’t get out to the newly opened garden centres? Heaton Fold Garden Centre are taking orders for home deliveries in the Bolton area. Take a look at their website www.heatonfold.co.uk I have received excellent comments about the quality of their plants and their prompt delivery so it is good to have the opportunity to support a local business. Their phone no. is 01204 336848.
- RHS Garden Bridgewater - Revised opening date is now Planned for 11th May, 2021.
.............................................
Irene